

How to Check Triathlon Bike Clip-On Compatibility Before You Buy

Triathlon bike clip-on compatibility is not something to guess from photos, product labels, or a quick look at your front end. It starts with the interface between the base bar and the extensions, then moves to the adjustment range that lets you hold a fast position without fighting the bike. At Tetsuo, we treat compatibility as a mechanical question first. When the hardware path is clean, fit changes become small, logical, and repeatable.
That is why we always start with the Compatibility Guide, not with arm pad width or extension tilt. A stable cockpit depends on stack architecture, mounting geometry, tightening discipline, and the range you need for your own posture. Once those foundations are right, it becomes much easier to decide whether Masamune, TAO X3, K Wedges, or a dedicated solution from our Plates collection is the correct path.
Many riders begin with the visible part of the setup. They compare pad shapes, extension curves, or accessory mounts. Those details matter later, but they do not answer the first question. The first question is whether your bike presents the right mounting architecture for the system you want to use. If that interface is wrong, no amount of creativity will turn the build into a reliable race platform.
We see this often when riders try to solve a hardware mismatch with fit changes. They slide the pads, rotate the extensions, or add extra parts in search of comfort. The result usually feels busy rather than precise. The front end can become noisy under load, the bottle or computer position gets harder to manage, and every future change becomes more difficult to repeat. A clean build feels calmer because every part is doing the job it was designed to do.
At Tetsuo, we separate these interfaces clearly. Our compatibility resources describe Dual Stack bikes as the straightforward route for most front-end upgrades. On the current Masamune setup, most major Dual Stack bikes work without additional adaptation when the distance between mounting holes falls inside the supported range. Our compatibility content also shows that some Central Stack bikes can use Masamune with a dedicated plate, while TAO X3 is intended for Dual Stack bikes and is not the solution for a Central Stack build.
This distinction matters because it changes the path you take from the start. A Dual Stack bike may let you move directly into front-end selection and fit refinement. A Central Stack bike pushes you toward the plate decision first. That is not a small administrative step. It determines how the loads move into the handlebar, how clean the install can be, and how much adjustment you keep once the cockpit is mounted.
Aerobar setups reward small, repeatable changes. We can only make those changes once the hardware is correct. If the mounting standard, slot position, or support hardware is wrong, every later adjustment becomes a compromise. That is why we prefer to lock the interface first, then work through contact points, tilt, reach, and accessory placement in that order.
You can see the same logic across our setup resources. In how to install triathlon aerobars, we frame installation as a process that starts before the first bolt is tightened. In triathlon aerobar measurements, we point out that the right answer is sometimes a hardware change rather than another micro-adjustment. Both resources push toward the same conclusion. Compatibility is the foundation that keeps the rest of the build honest.
Once you know the stack architecture, the next step is to record the dimensions that filter your options. This is the part that removes noise. Instead of comparing every aerobar on the market, you can quickly narrow the decision to the systems that actually match your bike and your fit direction.
For Masamune, our current product and compatibility resources show direct compatibility with most major Dual Stack bikes when the distance between mounting holes falls between 95 mm and 169 mm. TAO X3 follows a different mounting logic and remains focused on Dual Stack bikes only. In both cases, the important point is not just the number itself. It is the relationship between the slots on the bike and the shape of the hardware that will sit on them.
Measure carefully and write the result down before you compare products. Do not trust memory after a workshop session. If your numbers place the bike inside a direct-fit window, you can move on to pad and extension decisions. If not, the answer is not to force the install. The answer is to check whether the right plate exists and whether that route still gives you the adjustment range you need.
Compatibility is not only about getting the part to bolt on. It is also about whether the system can support your target posture. A cockpit may mount correctly and still fail to deliver the elbow spacing, hand angle, or pad relationship that lets you stay aero without tension. This is where the support range around the arms becomes part of the compatibility conversation, not just a fit conversation.
Masamune and TAO X3 both work with our wedge ecosystem, which allows the angle to move beyond the base position when the rider needs more support under the forearms and hands. K / Z Wedge Adaptor extends that tilt path when the fit goal is clear and measured. Masamune also adds wrist angle regulation, which is valuable when the goal is to reduce strain rather than simply stack more parts. If you know you need extra front-end support, build that requirement into the compatibility check from the beginning instead of treating it as an afterthought.
A cockpit can look correct on day one and still become a poor long-course setup if it is hard to rebuild after travel, hard to inspect, or hard to keep consistent after routine maintenance. We design our systems to be adjusted with logic rather than guesswork, but that only helps when the original hardware path is clean. If a front end needs too much improvisation to go together, it will usually ask for even more improvisation when it has to come apart and go back together again.
That matters for athletes who race often, pack the bike regularly, or like to validate changes in measured steps. A good system should let you document the build, return to known settings, and service the cockpit without losing the plot. If the setup feels fragile every time the bike is handled, the compatibility decision was probably not solved as early as it should have been.
Once the interface and the key dimensions are clear, product choice becomes simpler. We are not trying to fit every rider into the same answer. We are trying to give each bike a stable path that still leaves room for precise adjustment.
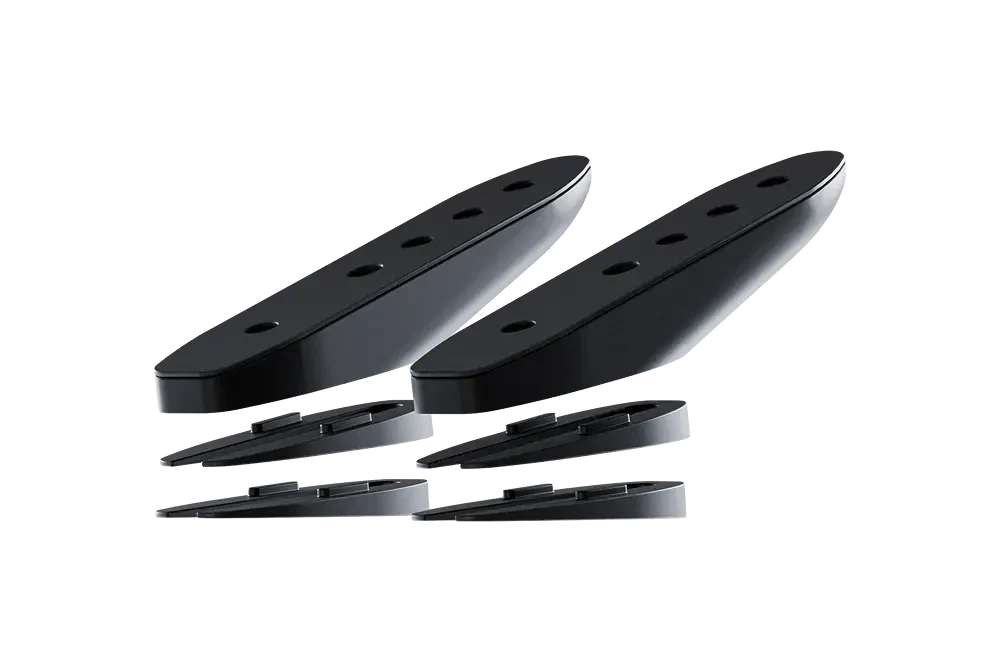
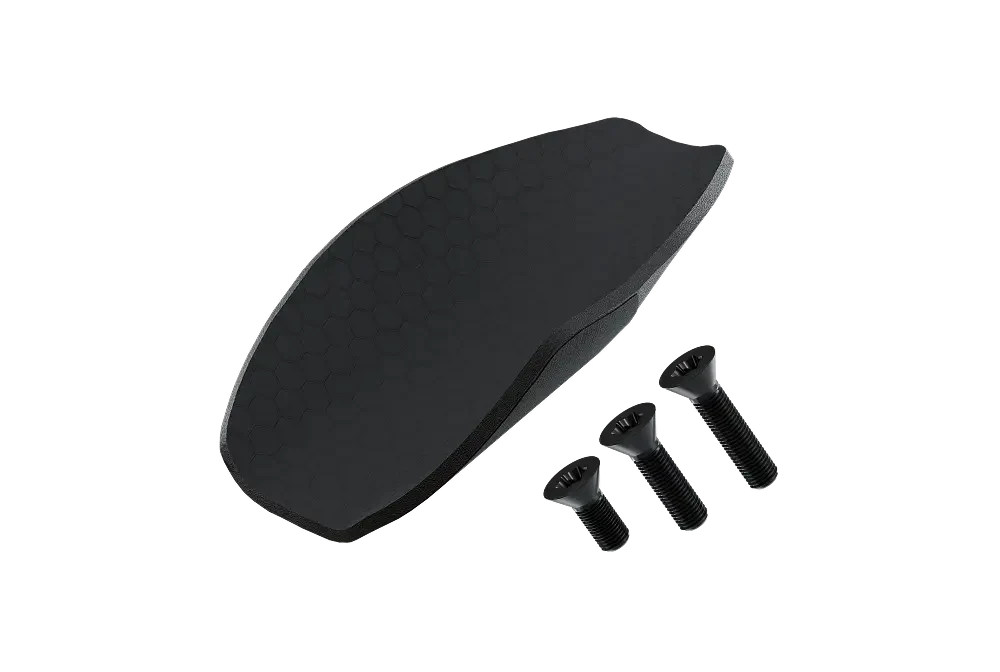
Masamune is our most complete route when the build needs broad adjustment, a refined support shape, and accessory integration around a high-performance cockpit. Our product page highlights a monocoque carbon body, removable foams, bottle and computer mounting options, and the ability to work with K Wedges for more angular support. On compatible Dual Stack bikes, it gives a very direct hardware path. On some Central Stack bikes, the correct plate keeps that path open without forcing a completely different front-end concept.
We usually prefer Masamune when the rider wants to treat the cockpit as a system rather than a set of loose parts. That includes athletes who care about hydration access, computer visibility, repeatable hand support, and the ability to refine the front end in small steps. If the bike can take the system cleanly, Masamune leaves more room to solve the whole posture rather than only the pad contact.
TAO X3 is the straightforward answer when the bike is clearly Dual Stack and the rider wants a lighter, simpler front-end path that still supports real fit work. Our product and compatibility pages position TAO X3 around carbon construction, EVA foams, and wedge compatibility, while staying explicit that it is not intended for Central Stack bikes. That clarity is useful because it prevents the wrong kind of build from moving forward.
We usually recommend this route when the interface is uncomplicated and the rider wants comfort, support, and clean setup logic without the extra system features of a fully integrated front end. The best setups often feel simple because they are simple. They do not need extra parts to look advanced. They need the right parts to feel stable.
A plate is not a workaround when the bike genuinely requires one. It is the correct mechanical link between the bar and the cockpit. We treat it that way in our Plates collection, where the goal is not to add noise but to preserve alignment, load management, and adjustment logic on bikes that need a dedicated interface.
If your bike needs this route, solve it early. Do not shop for extensions first and hope the mounting issue disappears later. Check the Compatibility Guide, confirm the plate path, then move into the cockpit decision. That order keeps the build predictable and protects the adjustment range you are trying to buy.
The fastest way to avoid returns, delays, and workshop frustration is to confirm a short list of facts before you place the order. Triathlon bike clip-on compatibility becomes much simpler when you reduce it to a few mechanical checks. We keep this process mechanical on purpose. It reduces emotion, speeds up the decision, and helps you arrive at the right setup with fewer detours.
| Check | What to confirm | Why it matters |
|---|---|---|
| Stack architecture | Identify whether the bike is Dual Stack or needs a plate-based path | This decides whether you can go direct fit or need interface hardware first |
| Mounting dimensions | Measure the relevant spacing and slot relationship on the base bar | This filters the compatible systems before you compare fit features |
| Support range | Define the tilt, hand position, and pad support you expect to need | This keeps you from buying a system that mounts but cannot hold your target posture |
| Serviceability | Check whether the build can be installed, packed, and rebuilt with repeatable settings | This protects consistency after travel, maintenance, and race-week assembly |
If you need a second layer of validation, move through our resources in a fixed order. Start with the Aerobars collection to compare platforms. Then use the Compatibility Guide to confirm the interface. Keep the Assembly Guide open during installation. Once the cockpit is secure, use adjust aerobar position to refine posture instead of guessing through random changes.
Good compatibility does not end when the parts arrive. The install itself tells you whether the decision was correct. A clean cockpit tends to confirm itself quickly. The bolts line up as expected, the parts sit naturally on the interface, and the first round of adjustments feels controlled rather than improvised.
When the system is right, the cockpit feels quiet. You do not feel like you are balancing on top of the bike. You feel supported into it. The forearms can settle, the shoulders can relax, and the hands can stay composed while you steer, drink, and shift. Accessory placement also becomes easier because the core structure is already doing its job.
This is where triathlon bike clip-on compatibility becomes obvious on the road. A correct build does not ask for constant correction. It lets you ride longer in aero without feeling like the front end is negotiating with you every minute. Stability is not an abstract luxury. It is what allows the rest of the aerodynamic package to work as intended.
If the install requires force in the wrong places, if the hardware path looks improvised, or if the setup loses clarity as soon as you start adjusting it, stop and review the interface again. The most common mistake is to keep pushing because the build is already halfway done. That usually makes the result harder to diagnose.
Another red flag is when the cockpit technically fits but pushes you toward a position you did not want. If the pads cannot land where they need to, if tilt support runs out too early, or if the system becomes awkward as soon as you add hydration or a computer mount, the decision was not fully solved. Compatibility is not only about installation. It is about leaving room for a position you can actually race.
Once the mechanical path is solved, the rest of the work gets much cleaner. This is where we want riders to spend their time because now the changes relate to performance instead of workaround logic. The cockpit is mounted correctly, so the next question is how to use that adjustment range with discipline.
We prefer to adjust one variable at a time. Start with pad contact and shoulder relaxation. Then confirm that extension length gives you access to the shifters without reaching or curling up. The goal is not to chase an aggressive look. The goal is to create a posture you can keep under fatigue. Our triathlon aerobar measurements and adjust aerobar position articles are useful here because they keep the process slow enough to stay accurate.
This is also where accessories stop being decoration and become part of the cockpit logic. A system that supports the forearms well but leaves the shifters too far away is not finished. A front end that looks narrow but forces tension through the wrists is not finished either. We want the contact points, the control points, and the support points to agree with each other.
Long-course setups are never only about the armrests. Hydration access and computer visibility change posture every time you use them. That is why we prefer to solve these parts as part of the cockpit rather than as late additions. On Masamune, the accessory ecosystem makes that integration easier. On simpler builds, the principle stays the same. The bike should let you drink, read data, and return to aero without opening the whole upper body.
We also care about repeatability. A good setup should survive cleaning, travel, maintenance, and measured refinement. When the front end is built on the right interface, you can document your settings, return to them, and keep moving forward without rebuilding the logic from zero each time. That is one of the clearest signs that the original compatibility decision was correct.
Start by checking the stack architecture and the mounting dimensions on the base bar. If the bike matches the supported interface of the cockpit you want, you can move into fit and accessory decisions. If it does not, solve the plate question first.
No. Pad position can refine contact once the hardware is correct, but it cannot fix the wrong interface. When the mounting logic is wrong, small fit changes only hide the problem for a short time.
Choose the option that gives you the right interface and the adjustment range your posture actually needs. Weight matters, but stability, support, and repeatable fit changes usually decide the quality of the build.
Record your measurements, inspect the hardware, and confirm that your cockpit can be rebuilt to the same settings without guesswork. A fast setup is only useful if it can return to the same position after the bike comes out of the case.

GETTING YOU FASTER
Configure your Masamune