


Specialized Shiv Aerobars for a More Adjustable Triathlon Cockpit


Specialized Shiv aerobars are not a simple extension swap. The Shiv front end is an integrated system, so the first question is not which shape looks fastest. It is whether the new cockpit has the correct interface, enough adjustment for your position and a mounting path that stays stable under load. In our range, the documented route for the Shiv is the Masamune system combined with the Plate Specialized Shiv. From there, fit, tilt, hydration and computer placement can be built around the rider instead of forced around the original hardware.
That distinction matters because a triathlon cockpit only works when every layer agrees with the next one. The bike needs a correct structural interface. The arm support needs enough surface and the right width. The hands need a natural angle. Hydration and data need to stay reachable without lifting the torso. When those pieces are treated as one system, the Shiv becomes easier to tune for long-course racing, repeated travel and day-to-day training.
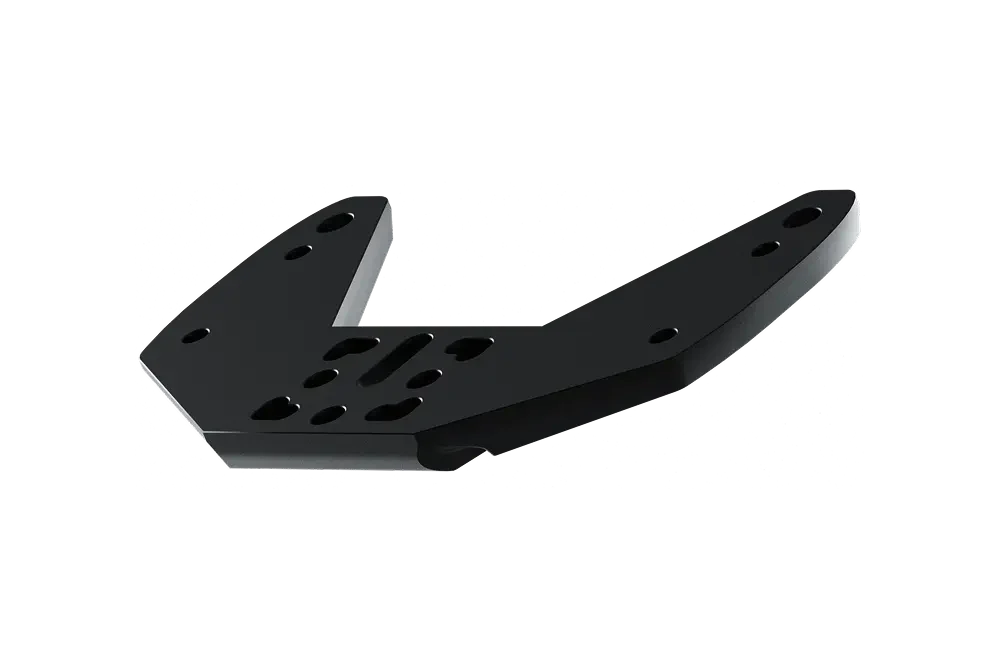
The Shiv has existed in different generations and front-end configurations. That means a product described as compatible with one Shiv setup should not automatically be assumed to fit every frame year or cockpit version. We avoid that shortcut. Our current Compatibility Guide lists the Specialized Shiv among the bikes that can use Masamune with an additional plate. The plate is the part that creates the mechanical interface between the bike and the aerobar body.
This is the right order to think about a build. First confirm the exact bike and mounting architecture. Then confirm the interface. Only after that should you decide reach, pad contact, wrist angle and accessories. Reversing the sequence usually creates unnecessary compromises because the rider starts choosing fit parts before the structural route is clear.
If your Shiv has been modified, uses a non-standard front end or combines parts from different model years, check the mounting points before ordering. Our compatibility information is the reference, and our Assembly Guide shows the correct installation paths for Masamune with and without a plate. A precise build begins with verified hardware, not assumptions.
An aero position places continuous load through the elbows, forearms and hands. That load is transferred into the cockpit for long periods, not just during short accelerations. The interface therefore needs to do more than connect two parts. It must preserve alignment, resist unwanted movement and give the fitter a predictable base from which to make position changes.
Our dedicated Shiv plate is manufactured from black anodized 7075 aluminium. The current product specification states that it can increase reach from 0 to +25 mm and records 0.18 mm of flex at the tip. Those figures matter because they show that the plate is not just a compatibility bridge. It also becomes part of the fit envelope, especially when a rider needs to move the cockpit forward without improvised spacers or unsupported extensions.
| Component | Documented role | Relevant specification |
|---|---|---|
| Plate Specialized Shiv | Creates the dedicated interface for the Shiv | 7075 aluminium, reach adjustment from 0 to +25 mm |
| Masamune | Carbon aerobar body and rider contact platform | 403 mm at neutral hand position, up to 429 mm extended |
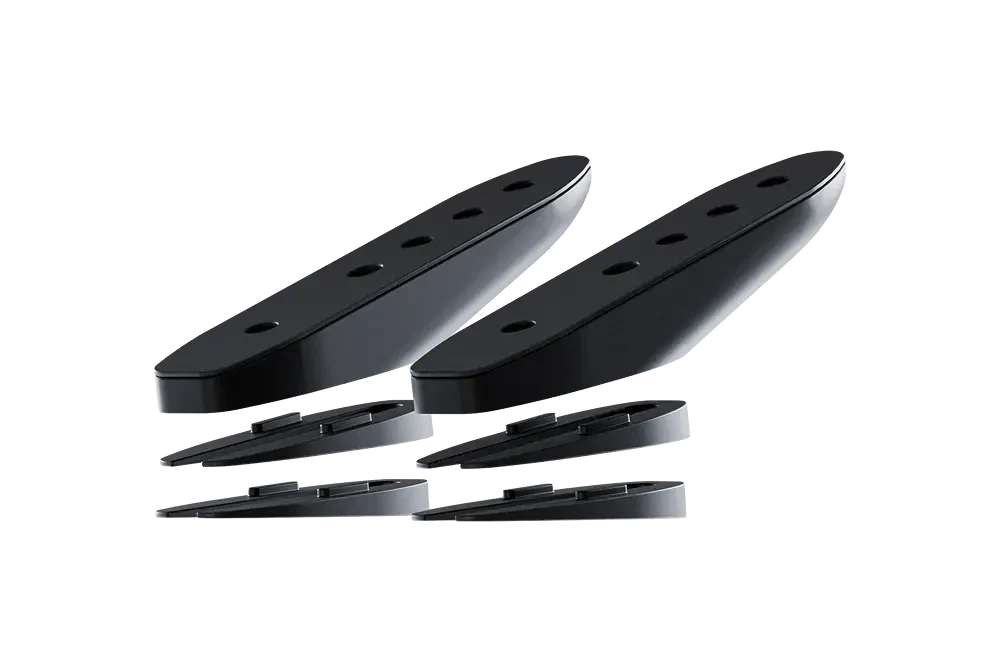
| K Wedges | Add controlled cockpit tilt | 10, 15 or 20 degree options |
| Garmin/Wahoo Holder | Keeps ride data integrated with the front end | Dedicated cockpit accessory |
| Bottle holder system | Builds hydration into the aero position | Adjustable holder with optional bar for one to three bottles |
The table also explains why we treat the cockpit as a stack of decisions. Compatibility is solved at the plate. Rider support is solved at Masamune. Angle is solved with wedges. Hydration and data are added only after the base position works. Each component has a defined job.
For a Shiv build that needs our dedicated plate, Masamune is the documented aerobar route. The body is built in a 100 percent unidirectional carbon monocoque and includes an integrated wire track. The current specification lists a weight of 249 g, 403 mm length with the handgrip in its neutral position and 429 mm when extended. The handgrip can be adjusted through a 0 to +10 degree range, while reach extension adds 0 to 30 mm at the hand position.
The important point is not the number of adjustments by itself. The benefit is that each change can be measured and repeated. A rider who needs more hand support can alter the grip angle. A rider who needs more reach can use the available extension range. A rider who wants more cockpit tilt can add our K Wedges. The goal is to solve one positional need at a time instead of forcing a single fixed shape.
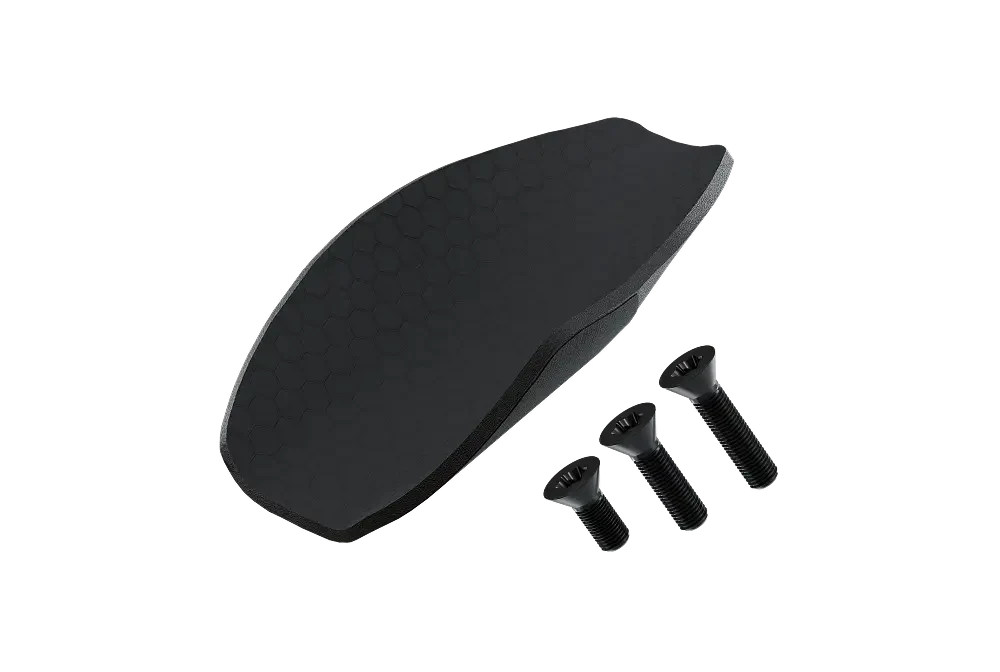
Masamune also uses removable ARAI foam on the forearm support. That matters because pad condition affects how stable the rider feels. When foam becomes compressed or uneven, the rider often compensates by gripping harder or shifting the elbows. Replacement Masamune Foams allow the contact surface to be restored without rebuilding the position.
Our TAO X3 is designed for Dual Stack systems and our compatibility page states that it is not compatible with Central Stack bikes. Because the Shiv is listed in our Masamune section as a bike requiring an additional plate, Masamune is the clearer route when building around the dedicated Shiv interface. The distinction matters because product choice should follow the mounting architecture, not price or appearance.
The fastest-looking setup is not automatically the fastest usable setup. In triathlon, the position must survive real riding. That includes road vibration, crosswinds, climbing transitions, hydration, feeding, cornering and the final hour of a long bike leg. If the rider has to sit up repeatedly because the neck, shoulders or wrists are overloaded, a visually aggressive cockpit has failed.
Our approach is to build contact first. Support the forearms. Set reach so the shoulders can stay quiet. Choose width that gives control without closing the chest. Adjust tilt so the wrists are neutral. Only then should stack be reduced if the rider can still breathe smoothly and keep the head stable.
The forearm contact area should feel planted rather than perched. If support sits only at the point of the elbow, pressure rises quickly and the rider starts using the hands to stabilise the torso. That turns an aero position into a muscular hold. Broader, consistent forearm contact lets the upper body relax and reduces the urge to make constant micro-corrections.
Masamune lists 140 mm elbow spacing in our compatibility information. That is a useful reference, but it is not a universal prescription for every athlete. Shoulder width, thoracic mobility and riding style all influence the final position. The correct width is the one that lets the athlete steer with the forearms while keeping breathing unrestricted.
Reach is often judged from a side photo, but the rider's sensation is more useful. If the shoulders are elevated, the elbows keep sliding forward or the athlete feels as if they are holding a plank, the front end is usually too long or too low. If the rider feels cramped, the knees approach the elbows or the hands sit behind their natural support point, more reach may help.
The Shiv plate can add 0 to +25 mm of reach at the interface. Masamune then provides further adjustment at the hand position. These are different layers of fit. The plate changes the structural location of the cockpit. The aerobar changes where the rider's hands and forearms sit within that cockpit. Keeping those roles separate makes fitting more controlled.
Wrist angle is one of the easiest places to lose comfort. If the hands are forced down, the forearms often tense. If the hands are excessively high without support, the rider may load the elbows and shrug the shoulders. We use tilt as a measured adjustment, not as a visual trend.
Our K Wedges are available in 10, 15 and 20 degree configurations. The K / Z Wedge Adaptor adds 5 degrees to the relevant wedge setup. This gives a repeatable way to test hand height and forearm angle. Change one step, ride it under race effort, then decide whether it improves breathing, neck position and pressure through the hands.
The following numbers are useful because they define the adjustment envelope of the components we currently sell. They should not be read as a single recommended fit. They are boundaries within which a fitter or rider can build a sustainable position.
| Adjustment area | Current documented range | What it changes |
|---|---|---|
| Shiv plate reach | 0 to +25 mm | Moves the cockpit interface forward |
| Masamune handgrip angle | 0 to +10 degrees | Refines wrist orientation |
| Masamune hand position reach | 0 to 30 mm | Fine-tunes where the hands meet the extension |
| K Wedge tilt | 10, 15 or 20 degrees | Changes forearm and extension angle |
| Masamune recommended tightening range | 4 to 7 Nm | Applies to the documented Masamune mounting points |
Torque deserves special care. Our Compatibility Guide lists 4 to 7 Nm for the documented Masamune mounting points. That number should not be assumed to apply to every bolt on the Shiv or every piece of hardware in the complete front end. Use the correct instructions for each fastener, follow the assembly sequence and use a calibrated torque wrench. Carbon and aluminium interfaces reward precision.

A clean aero position can be undone by accessories that force the rider to move. If the computer sits too low or too far forward, the athlete lifts the head to read it. If the bottle is difficult to reach, the shoulders rotate and the torso rises every time the athlete drinks. Those movements may be brief, but they repeat for hours.
We prefer to integrate accessories after the base fit is stable. The Garmin/Wahoo Holder keeps ride data within the cockpit ecosystem. For hydration, our Bottle holder has an adjustable angle. The Bottle holder bar can then support one to three bottles when used with the required holder.
This is especially relevant on long-course builds where hydration access is part of the aerodynamic position. The objective is not simply to carry more fluid. It is to make drinking possible without breaking posture. Our guide to aerobar hydration goes deeper into bottle access, shoulder movement and cockpit integration.
A precise installation is easier when the process is separated into stages. Do not use the first ride as the place where compatibility, fit and accessory placement are all discovered at once.
For the physical sequence, use our Assembly Guide. For post-installation tuning, our article on how to adjust aerobar position explains a single-variable process for pad contact, reach, stack, width and tilt.
This is the most expensive shortcut. A rider chooses the extension shape first, then tries to make it work with the original mounting architecture. The better route is the opposite. Confirm the bike interface, choose the dedicated plate if required, then build the aerobar system on top of a known mechanical base.
Multiple simultaneous changes make testing meaningless. If comfort improves, you do not know which variable helped. If control gets worse, you do not know which one caused it. Move one major variable, ride it at meaningful intensity and keep notes. The process is slower for one session and faster over the whole fit.
A lower front end can reduce frontal area, but only if the athlete can hold it. If the neck is overloaded, breathing becomes restricted or the shoulders start to rise, the athlete will leave aero. A slightly higher position that can be maintained for the full bike leg can be the more aerodynamic real-world option.
Hydration is not an accessory problem at the end of the build. It is part of how the athlete moves in the cockpit. Bottle placement changes reach, sight lines and hand movement. Test the complete race configuration, not a stripped-down training version that behaves differently on race day.
The best fit loses value if it cannot be reproduced after travel. Measure visible reference points, photograph spacer order and mark left-right alignment. A repeatable cockpit removes uncertainty from race week and makes workshop changes easier to reverse.
A new cockpit is useful when it solves a defined limitation. That may be wrist discomfort, restricted reach, poor forearm support, difficulty integrating hydration, weak repeatability after travel or a fit range that no longer matches the athlete. The upgrade should have a reason that can be tested.
Our Masamune and dedicated Shiv plate route is built around that principle. The plate solves the bike interface. Masamune provides carbon structure and multiple contact-point adjustments. K Wedges add measured tilt. The computer and bottle mounts complete the system without forcing the athlete to redesign the position around accessories.
If your current position is already comfortable, stable and repeatable, changing hardware only for appearance is not a strong reason. If the front end prevents you from reaching the fit your body needs, then a modular system can create useful room to work. Start with the Compatibility Guide, then compare the full aerobars range and the dedicated Shiv plate.
Our current compatibility information lists the Specialized Shiv as compatible with Masamune when an additional plate is used. Because different Shiv generations and cockpit configurations exist, confirm your exact mounting architecture before ordering.
We sell a dedicated Plate Specialized Shiv for the Masamune compatibility route. It is manufactured from 7075 aluminium and provides 0 to +25 mm of reach adjustment at the interface.
TAO X3 is documented for Dual Stack systems and is not compatible with Central Stack bikes. For the Shiv compatibility route shown on our site, Masamune with the dedicated plate is the documented solution. Check the exact cockpit before purchase.
Our K Wedges are available in 10, 15 and 20 degree configurations. The K / Z Wedge Adaptor can add 5 degrees to the relevant wedge setup. Test tilt progressively and validate it under race effort.
Our compatibility guide lists a recommended 4 to 7 Nm range for the documented Masamune mounting points. Do not apply that range automatically to every Shiv fastener. Follow the correct instructions for each component and use a torque wrench.
Yes. Our cockpit ecosystem includes the Garmin/Wahoo Holder, an adjustable Bottle holder and the Bottle holder bar. Final placement should be tested with the complete race position so drinking and reading data do not force unnecessary torso movement.

A DAR-LHE MAIS VELOCIDADE
Configure o seu Masamune