Thinking about buying your first set of triathlon aerobars or upgrading your current Ironman cockpit? I get it—choosing the best aerobars for triathlon can feel overwhelming, especially if you’re new to the sport. After years helping athletes across all levels—pros, semi-pros, and high-intent amateurs—I’ve identified the seven most common mistakes people make when selecting their aero cockpit.
The good news: these mistakes are completely avoidable. In this comprehensive guide, you’ll learn exactly how to choose the right aerobars for you, what features to look for, and how to avoid the traps that can cost you time, money, and—most importantly—performance.
Why Choosing the Right Aerobars Matters
Before diving into specific mistakes, it’s essential to understand why a good choice can be the difference between a successful season and a frustrating one. Aerobars are not just another accessory; they are the bridge between your body and your bike during the most decisive hours of your race.
Choosing the wrong beginner triathlon aerobars can cause:
- Early fatigue in arms and shoulders
- Lower back pain during and after training
- Loss of aerodynamic power
- Discomfort that forces constant position changes
- Overuse injuries
On the other hand, well-selected triathlon aerobars can completely transform your experience. Wind-tunnel-validated cockpit upgrades can save you ~15–20 watts simply by improving the front-end aero interface.
Error #1: Choosing Aerobars Without Considering Your Level and Experience
The most common issue among new triathletes
By far the most frequent—and costly—mistake: selecting highly aggressive, pro-level aerobars without having the flexibility, strength, or experience to use them correctly.
How to know if this is you
- It’s your first time using aerobars and you pick the most aggressive model available
- You copy your favorite pro’s setup without considering body differences
- You prioritize aerodynamics over comfort from day one
- You have little patience for a gradual adaptation process
The solution: Smart progression
Think of triathlon aerobars as a progression tool. If you’re starting out, you need a versatile, adjustable cockpit that lets you build strength, flexibility, and technique before moving into more aggressive positions.
Recommended progression plan
Weeks 1–4: Basic adaptation
- Conservative setup with 10–15° tilt
- Short sessions (30–45 minutes)
- Focus on holding position without strain
Weeks 5–8: Endurance development
- Sessions of 60–90 minutes
- Introduce moderate intensity
- Small position tweaks every two weeks
Weeks 9–12: Advanced optimization
- Long rides (2+ hours)
- Work toward more aggressive positions
- Add angle wedges/spacers for fine-tuning
Error #2: Ignoring Compatibility With Your Bike
A wasted investment if it doesn’t fit
Imagine this: you find the perfect Ironman cockpit on sale, buy it, it arrives… and it doesn’t fit your bike. This happens more often than you’d think.
Common compatibility problems
-
Incorrect mounting spacing: Many modern bikes use dual-stack mounting, but hole spacing varies. If your base bar is 95 mm and the cockpit is drilled for 160 mm, it simply won’t fit.
-
Center-stack base bars: Some bikes—especially older models—use a center-stack system. Dual-stack-only aerobars will not work here.
-
Cable interference: Brake/shift cables (especially with external routing) can interfere with certain cockpit designs.
How to verify compatibility before buying
-
Identify your base bar type
M easure the mounting hole spacing, confirm dual-stack vs. center-stack, and check your bike’s manual.
-
Check the manufacturer’s specs
Look for stated compatible hole spacing ranges (e.g., 95–169 mm) and whether model-specific adapter plates exist (common for aero TT frames).
-
Consider required accessories
Adapter plates and risers can preserve structural integrity and position range when needed.
Tools you’ll need
- Caliper or ruler to measure spacing
- Your bike’s user manual
- The cockpit maker’s compatibility page/checklist
Error #3: Not Prioritizing Ergonomics and Comfort From the Start
Comfort is not optional—it’s performance
One dangerous myth in triathlon: “You have to suffer to be fast.” Yes, the sport is hard—but pain from bad equipment setup is counterproductive.
Signs your triathlon aerobars aren’t ergonomic
Immediate physical symptoms:
- Wrist pain after 30 minutes
- Numbness in arms or fingers
- Excessive neck and shoulder tension
- New lower-back pain
Performance symptoms:
- Frequent need to change position
- Power fade after prolonged efforts
- Difficulty holding aero
- Premature fatigue on long rides
Key ergonomic elements to evaluate
-
Arm pads: Quality pads aren’t just about comfort—they distribute load correctly, reduce slip (anti-slip, moisture-resistant surfaces help), and stabilize your position for hours.
-
Shape and width: Width should let your arms “fall” naturally without forcing shoulders inward/outward. Too narrow = tension; too wide = lost aero.
-
Support angle: The angle should follow your forearm line. Over-aggressive angles force unnatural positions you can’t hold across a full race.
How to test ergonomics properly
30-minute test: After an initial setup, ride easy for 30 minutes in aero and note any pressure points or tension. Can you hold the position without strain?
Race simulation: Once you pass 30 minutes comfortably, complete a 90-minute session at race effort with intensity changes and evaluate fatigue in arms, shoulders, and back.
Tools to optimize ergonomics
-
Angle wedges: Adjustable wedges (e.g., 10°, 15°, 20°) let you find a forearm tilt that matches your anatomy and event demands.
-
Micro-adjust systems: Cockpits with fine adjustment increments make a big difference in comfort and performance.
Error #4: Obsessing Over Aerodynamics and Ignoring Other Factors
Aero matters—but it isn’t everything
It’s natural to chase watt savings. Seeing that a front-end upgrade can save 15–20 watts is exciting. But focusing solely on aerodynamics can backfire.
Why pure aero can be counterproductive
-
Comfort-limited power: An aero position you can’t sustain costs more watts than it saves—if you must sit up every 20 minutes, you’re losing speed.
-
Compounding fatigue: Forced positions build fatigue exponentially; what feels tolerable in 60 minutes becomes torture at 3–4 hours.
-
Muscle tension reduces power: Over-tense muscles produce less power; real-world losses can exceed aero gains by 15–20%.
How to balance aero and sustainability
-
The 90% Rule: Aim to capture ~90% of potential aero gains. The last 10% often demands compromises not worth it for most triathletes.
-
Timed progression: Months 1–2: comfort/technique → Months 3–4: conservative aero gains → Month 5+: optimize while keeping the position sustainable.
Factors more important than pure aero
- Consistency holding position
- Pedaling efficiency in aero
- How your aero setup affects transitions and the run
Evaluation tools
-
Maintained power test: Compare normalized power in long rides with and without aero. If you’re down >10 W in aero at the same effort, your position may be too aggressive.
-
Heart-rate analysis: A correct position shouldn’t raise HR in sub-max efforts. If HR rises by 5+ bpm for the same power, review your setup.
Error #5: Buying Low-Quality Aerobars “Just to Try”
The false economy of cheap cockpits
The logic sounds reasonable: “I’ll buy a cheap set to see if I like the aero position, then upgrade later.” In practice, this often costs more and slows progress.
The real problems with budget aerobars
-
Materials: Soft alloys that deform; pads that break down quickly; clamps that loosen; finishes that corrode.
-
Design: Generic ergonomics; limited adjustment range; unstable mounts; geometry that doesn’t replicate real TT/triathlon setups.
Impact: Poor equipment can make aero feel uncomfortable—or even painful—when the real issue is the hardware, not the position.
How this decision costs more long-term
-
Double spend: Buying twice is always more expensive than investing correctly once.
-
Lost time: Each swap restarts the adaptation process.
-
Negative experience: You might abandon aero entirely after a bad first impression.
What defines a quality Ironman cockpit
-
Premium materials: High-grade carbon for stiffness-to-weight and stability under load.
-
Monocoque construction: Fewer flex points, better power transfer, superior durability.
-
Precise adjustability: Wide and granular adjustment ranges (e.g., tilt in 5° steps up to ~20°).
-
Integrated ecosystem: Computer mounts and hydration options designed to integrate without compromising aero or ergonomics.
Smart buying strategy
- Research established brands with proven track records
- Consider total cost: base cockpit + pads + wedges/risers + fit/installation
- Leverage warranties and return policies (2-year warranty / 30-day returns are common among quality makers)
Error #6: Overlooking Accessories and the Complete Setup
Aerobars are only part of the system
Many triathletes focus solely on the base bars and ignore the accessories that unlock the cockpit’s real potential.
Essential accessories that maximize your investment
-
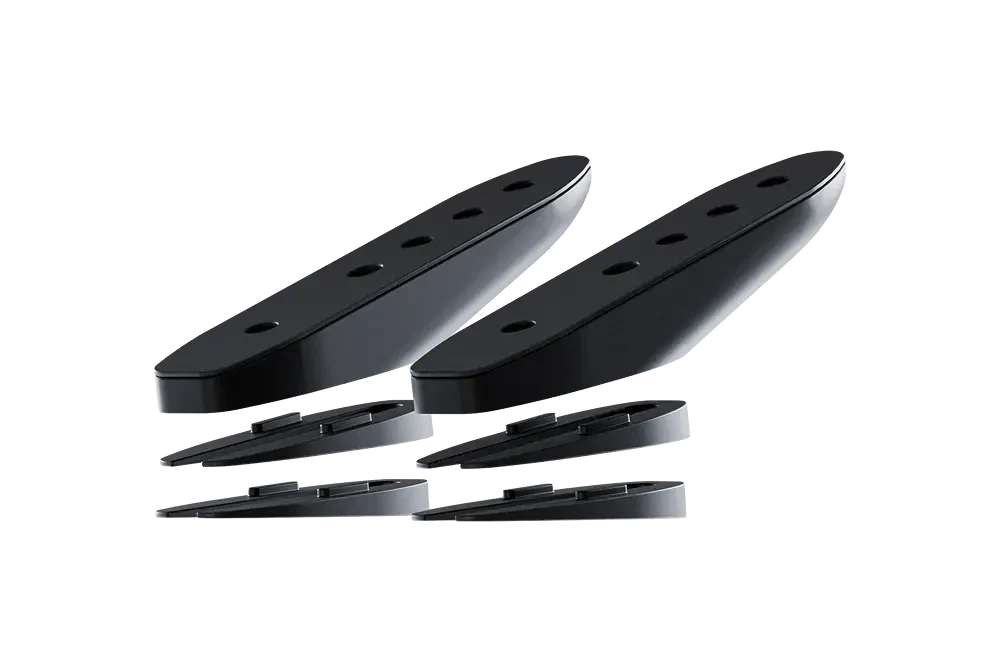
Compatibility plates: Frame-specific plates keep structural integrity and position range on tricky TT frames.
-
Angle wedges/risers: 10–20° options adapt to anatomy and flexibility over time.
-
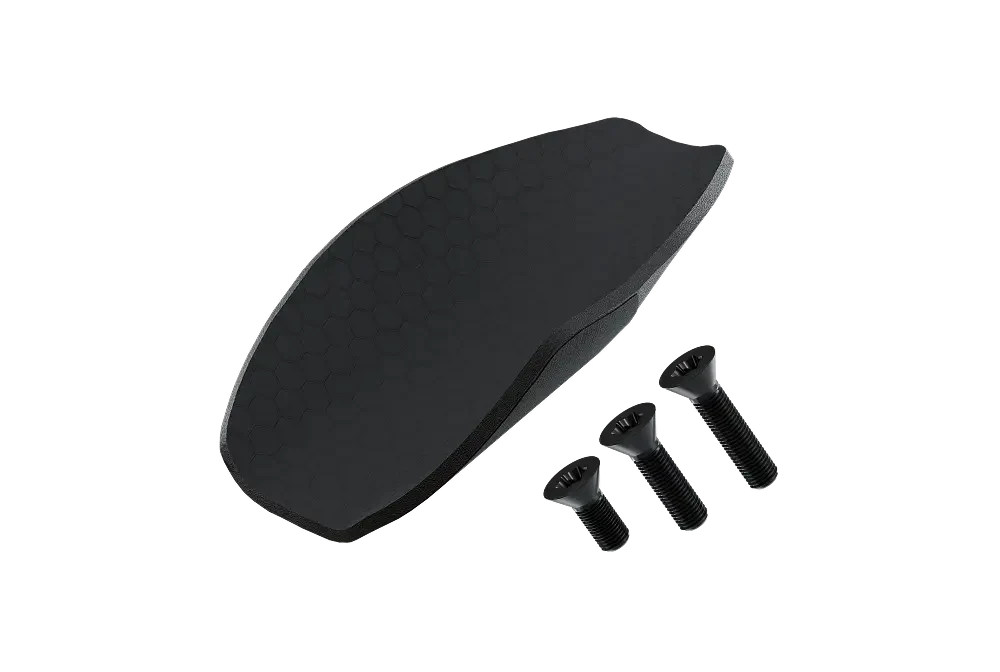
Quality pads: Anti-slip, moisture-resistant pads prevent sliding and pressure points over long efforts.
-
Integrated hydration: Angle-adjustable bottle mounts enable drinking without leaving aero; critical for long-course racing.
Pro fit vs. DIY
Consider professional help for: first installation, new bike, compatibility puzzles, or race-specific optimization.
DIY is fine for: minor tweaks, pad swaps, accessory installs, and routine checks.
Maintenance tools you’ll need
- 4/5/6 mm hex keys
- Torque wrench
- Carbon assembly paste
- Carbon-safe cleaner
- Spare bolts (carry them on race day)
Setup evolution
Initial (first 3 months): Base cockpit, 10–15° wedges, standard pads, conservative geometry.
Intermediate (3–6 months): Angle refinements, add hydration, optimize pad width/stack, first personalized tweaks.
Advanced (6+ months): Race-specific optimization, specialized add-ons, alternate setups for different courses/conditions, integrated monitoring.
Smart budgeting for a complete triathlon aerobars setup
-
Initial investment: ~70% cockpit, ~20% essentials (pads/wedges/risers), ~10% fit/installation
-
Gradual expansion: Months 1–3: functional basics → Months 4–6: optimization/comfort → Month 7+: advanced personalization
Error #7: Not Considering After-Sales Support and Community
Ongoing support matters
Triathlon aerobars are not “install and forget.” Your position evolves, your flexibility improves, your goals change. Choosing a brand without after-sales support can limit your long-term progress.
What to look for in support
-
Accessible tech help: Expert responses within 24–48 hours, detailed documentation, setup videos
-
Spare parts availability: Pads, hardware, replacement components in stock for years
-
Fair warranty and returns: Clear coverage and simple processes
-
Active user community: Setup tips, troubleshooting, shared experiences, motivation
Red flags
- Generic copy-paste responses
- No spares available
- No visible user community
Step-by-Step Process to Choose Your Perfect Ironman Cockpit
Phase 1: Personal assessment and goals
- Measure flexibility (shoulders, lower back)
- Note any limitations/injury history
- Evaluate aero experience and commitment to adaptation
- Define goals: first tri vs. experienced, sprint/olympic vs. long course, target times, budget
Phase 2: Research and selection
- Identify exact bike model and base bar
- Measure mount spacing; verify on the manufacturer’s compatibility page
- List needed accessories (plates, wedges, pads)
- Select model by level:
-
Beginners: versatile, highly adjustable cockpit
-
Intermediates: balance of performance and comfort
-
Advanced: customized setups with specific accessories
Phase 3: Smart purchase
- Order: base cockpit + compatibility plate (if needed) + wedges + spare pads + computer/hydration mounts
- Check returns/warranty coverage
- Consider payment plans if helpful
Phase 4: Installation and initial setup
- Professional installation recommended for first-time setups or complex frames
- Start with conservative angles (10–15°), prioritize comfort while maintaining aero
Phase 5: Adaptation and optimization
-
Weeks 1–4: 30–45 min sessions, hold position, weekly comfort checks
-
Weeks 5–8: 60–90 min, add intensity, start fine adjustments
-
Weeks 9–12: 2+ hours, move toward race position, finalize for event
Phase 6: Maintenance and evolution
-
Monthly: Torque checks, pad inspection, carbon-safe cleaning
-
Quarterly: Deep clean, lubricate adjust points, verify alignment
-
Annually: Replace pads, pro check of structural integrity, update setup to current goals
Tools, Apps, and Learning Resources
Measurement tools
- For compatibility: digital caliper, metric ruler, base-bar template
- For setup: bubble level, goniometer, camera for position analysis
Useful apps/software
- Video analysis and angle measurement tools
- Training planning apps and performance analytics
Educational resources
- Installation manuals and compatibility guides
- Setup tutorials and long-course race checklists
- Specialized triathlon forums and user groups
Real-World Scenarios: Transformations With the Right Aerobars
Case 1: Beginner (Sprint → Olympic)
Initial situation: Started with budget alloy aerobars; wrist pain; could only hold aero for 20 minutes.
Solution: Versatile cockpit with 10° wedges, quality pads, progressive 8-week plan.
Results: No wrist pain; 90+ minutes in aero; 3-minute improvement in Olympic bike split; moved up to 70.3.
Case 2: Experienced athlete targeting Ironman PR
Initial situation: Good—but static—aero position; shoulder fatigue late in the bike; needed extra watts to break a time barrier.
Solution: Higher-tilt options (15–20°) with integrated hydration and computer mount.
Results: ~18 W average savings (wind-tunnel verified setups); 15-minute reduction in Ironman bike split; no shoulder blow-up.
Case 3: Road cyclist transitioning to triathlon
Challenge: Hip tightness from years of road geometry; trouble producing power in aero; mild dizziness adapting to new posture.
Strategy: Conservative tilt initially, gradual wedge progression, then final race-optimized cockpit.
Lessons: Patience, micro-adjustments, and equipment quality accelerate adaptation.
Long-Term Care and Pad/Component Replacement
Preventive maintenance program
-
Monthly: Check bolt torque, inspect pads for wear/deformation, clean carbon with proper products
-
Quarterly: Deep clean, lube adjust points, verify alignment and stability
-
Annually: Replace pads, pro inspection for structural integrity, review setup to match evolving goals
Signs you need replacements
-
Pads: Loss of shape, discoloration, poor Velcro adhesion, cracks/tears
-
Structural components: Any visible carbon cracks, permanent deformation, notable loss of stiffness, worn contact points
How to maximize lifespan
- Dry, temperature-stable storage; no direct sunlight
- Avoid chemical exposure; use carbon-safe cleaners
- Respect weight limits; avoid impacts or drops
- Regular post-ride cleaning in hot/salty conditions
FAQ: Triathlon Aerobars, Ironman Cockpit & Setup
How do I know if aerobars are compatible with my bike?
Measure the mounting hole spacing on your base bar. Many quality cockpits cover ~95–169 mm without adapters. For special frames, check if model-specific plates exist. Consult the manufacturer’s compatibility guide or support team.
Can I install my Ironman cockpit myself?
Yes, if you’re comfortable with tools. Use torque specs, carbon paste, and follow the manual. For a first install, a professional fit is often worth it.
How do I find the right position?
Start conservatively and make incremental changes. Use wedges/risers to tune tilt and stack. Comfort first—then add aero.
How often should I adjust my position?
Every two weeks during the first 2–3 months, then as your flexibility/goals change. Minor tweaks are normal as you adapt.
When should I add accessories?
After mastering the basic position (2–3 months). Start with integrated hydration, then add a computer mount.
Conclusion: Your Next Step Toward Optimal Performance
Choosing the right triathlon aerobars is one of the most impactful decisions you can make as a triathlete. Remember the seven critical mistakes—and the fixes:
- Match cockpit choice to your level (progress gradually)
- Verify compatibility before buying
- Prioritize ergonomics and comfort
- Balance aero with sustainability
- Invest in quality—avoid false economies
- Think system: pads, wedges, hydration, mounts
- Choose brands with support and communities
Action plan by level
-
Beginners: Versatile, adjustable cockpit; 10° wedges; quality pads; 12-week adaptation plan
-
Experienced: Race-optimized cockpit; integrated accessories; advanced wedge tilt; consider a professional aero fit
Every training block you delay optimizing your Ironman cockpit is a missed opportunity. Start now: week 1 = better comfort; month 1 = sustainable aero; month 3 = measurable gains; month 6 = fully optimized performance.
Have questions about compatibility or setup? Check the maker’s compatibility guide or consult a professional fitter to dial your position for your target race.